Cats, with their natural curiosity and playful instincts, often need a variety of toys to keep them entertained. One popular and effective option is a cat toy tower. This multi-level structure can provide hours of fun and exercise for your feline friend. In this article, we’ll guide you through the process of building your own cat toy tower, from planning to construction.
In This Article
- 1 Choosing the Right Materials
- 2 Designing Your Cat Toy Tower
- 3 Share creative and affordable ways to create a homemade cat toy tower
- 4 Step-by-Step Construction
- 5 Offer step-by-step instructions and materials needed for DIY projects
- 6 Tips for Enhancing Your Cat’s Enjoyment
- 7 Emphasize the importance of safety and durability
Choosing the Right Materials
The foundation of your cat toy tower is its materials. Opt for sturdy and non-toxic materials that are safe for your cat. Consider the following:
- Wood: Plywood or pine are good choices for the base and shelves. Ensure the wood is treated to prevent splinters.
- Carpet or fabric: Cover the shelves with soft, durable fabric or carpet to provide traction and comfort for your cat.
- Posts: Use sisal rope-wrapped posts for scratching and climbing. Sisal is a natural fiber that cats love.
- Hardware: Secure the structure with screws, nails, and brackets. Choose high-quality hardware that can withstand your cat’s weight and playfulness.
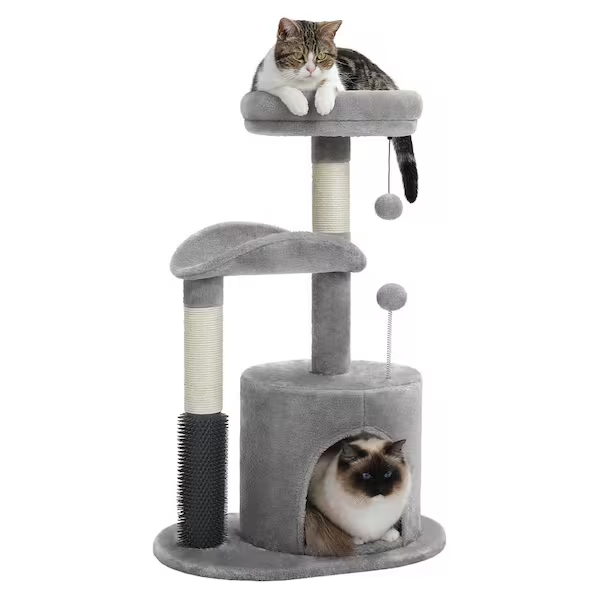
Designing Your Cat Toy Tower
Before you start building, create a design plan. Consider the following factors:
- Size: The tower should be large enough for your cat to comfortably move around and play.
- Height: Cats love to climb, so aim for a tower that is at least 4 feet tall.
- Number of levels: The more levels, the more opportunities for exploration and play.
- Features: Incorporate features like perches, hanging toys, and scratching posts to enhance your cat’s enjoyment.
Here are some creative and budget-friendly ideas for building a homemade cat toy tower:
Repurpose Furniture
- Bookshelf: Convert an old bookshelf into a cat tower by adding shelves, scratching posts, and hanging toys.
- Ladder: Attach shelves to a sturdy ladder to create a vertical climbing structure.
- Chair: Remove the seat cushion and add shelves and scratching posts to a chair frame.
Use Cardboard Boxes
- Stacking boxes: Stack cardboard boxes of different sizes and connect them with tape or glue. Add shelves and scratching posts for added interest.
- Tunnel tower: Create a tunnel by cutting holes in the sides of cardboard boxes. Stack the boxes to form a tower.
DIY Climbing Wall
- Plywood and sisal rope: Cut a piece of plywood and attach sisal rope vertically to create a climbing wall. Attach the wall to a sturdy base.
Branch Tower
- Natural branches: Gather sturdy branches of varying sizes from your yard. Secure the branches together with rope or wire to create a tree-like structure.
PVC Pipe Tower
- PVC pipes: Connect PVC pipes of different lengths using PVC fittings. Add shelves and scratching posts made from wood or cardboard.
Fabric-Covered Tower
- Wooden frame: Build a wooden frame with shelves. Cover the frame with fabric or carpet for added comfort and aesthetic appeal.
Hanging Toys and Perches
- Add-ons: Attach hanging toys, perches, and scratching posts to your homemade tower to enhance its appeal. Consider using old toys, repurposed items, or items you can make yourself.
By repurposing materials, using affordable options, and adding creative touches, you can build a homemade cat toy tower that is both fun and functional.
Step-by-Step Construction
Now that you have your materials and design, it’s time to build. Follow these steps:
- Cut the wood: Measure and cut the wood pieces according to your design. Use a jigsaw or circular saw for precise cuts.
- Assemble the base: Attach the base pieces together using screws and brackets. Ensure it is sturdy and level.
- Add the posts: Drill holes into the base and attach the sisal-wrapped posts. Secure them with screws or glue.
- Build the shelves: Cut and attach the shelves to the posts at desired heights. Use brackets or L-brackets for support.
- Cover the shelves: Cover the shelves with your chosen fabric or carpet. Use staples or glue to secure it in place.
- Install hanging toys: Attach hanging toys to the top of the tower or to the shelves. Consider toys that your cat enjoys, such as catnip-filled balls or feathers.
- Add finishing touches: Apply a coat of non-toxic paint or stain to the wood for added protection and aesthetic appeal.
Offer step-by-step instructions and materials needed for DIY projects
Cardboard Tube Cat Tunnel
Materials:
- Cardboard tubes (from paper towels, toilet paper, or wrapping paper)
- Scissors
- Duct tape
- Markers or paint (optional)
Instructions:
- Prepare the tubes: Cut the tubes to desired lengths. For a longer tunnel, connect multiple tubes using duct tape.
- Decorate (optional): Add fun designs or colors using markers or paint. Let dry completely.
- Create a play area: Place the tunnel in a location where your cat can explore and play.
Fabric Catnip Pouch
Materials:
- Small piece of fabric (cotton, flannel, or felt)
- Thread and needle or sewing machine
- Catnip
Instructions:
- Cut fabric: Cut a square piece of fabric.
- Sew the sides: Fold the fabric in half, right sides together. Sew the sides together, leaving an opening.
- Fill with catnip: Fill the pouch with catnip.
- Close the opening: Sew the remaining opening closed.
DIY Cat Scratching Post
Materials:
- Wooden dowel or pole
- Sisal rope
- Sturdy base (e.g., a wooden plank or a large flower pot)
- Screws or nails
Instructions:
- Prepare the base: Secure the base to a stable surface.
- Wrap the sisal rope: Wrap the sisal rope around the dowel or pole, starting from the bottom. Secure the end with glue or a knot.
- Attach to base: Attach the dowel or pole to the base using screws or nails.
Paper Bag Cat Toy
Materials:
- Paper bag
- Treats or toys
Instructions:
- Prepare the bag: Crumple the paper bag slightly to make it more interesting.
- Add treats or toys: Place treats or toys inside the bag.
- Let your cat play: Encourage your cat to explore the bag and retrieve the treats or toys.
By following these simple steps, you can create fun and engaging DIY cat toys that will keep your feline friend entertained for hours.

Tips for Enhancing Your Cat’s Enjoyment
To make your cat toy tower even more appealing, consider these tips:
- Rotate toys: Regularly switch out the toys on the tower to keep your cat interested.
- Provide catnip: Sprinkle catnip on the toys or the tower itself to entice your cat.
- Encourage interaction: Play with your cat on the tower to show them how much fun it can be.
- Consider your cat’s preferences: Observe your cat’s behavior to see what toys and features they enjoy the most.
Emphasize the importance of safety and durability
When creating homemade cat toys, it’s essential to put safety and durability at the forefront. These two factors can significantly impact your cat’s enjoyment and well-being. Here’s why:
Safety First
- Avoid choking hazards: Ensure all materials used are large enough to prevent your cat from swallowing them. Small pieces, such as buttons or beads, can pose a serious choking risk.
- Non-toxic materials: Opt for materials that are safe for pets. Avoid using paints, glues, or other chemicals that might be harmful if ingested.
- Secure attachments: Make sure all components are securely attached to prevent your cat from tearing them off and ingesting them.
Durability Matters
- Sturdy construction: Use strong materials and secure fastenings to ensure your toys can withstand your cat’s playful antics.
- Consider your cat’s playstyle: If your cat is a rough player, choose durable materials that can withstand chewing and scratching.
- Regular inspections: Periodically check your homemade toys for signs of wear and tear. If a toy becomes damaged, discard it immediately.
Safe Material Suggestions
- Natural fibers: Cotton, jute, and sisal are safe and durable choices for toys.
- Soft fabrics: Flannel, fleece, and felt can be used for soft toys.
- Cardboard: Cardboard boxes and tubes can provide hours of entertainment.
- Wooden toys: Ensure the wood is smooth and free of splinters.
By prioritizing safety and durability, you can create homemade cat toys that are both fun and safe for your feline friend. Remember, a happy and healthy cat is a well-cared-for cat.
Building a cat toy tower is a rewarding DIY project that can provide endless entertainment for your feline friend. By following these guidelines and customizing your tower to your cat’s preferences, you can create a stimulating and enjoyable environment for them to explore and play.